All Categories
Featured
Table of Contents
- – Water Line Repair Carmel Mountain Ranch, CA
- – Black Mountain Plumbing
- – Kitchen Plumbing Carmel Mountain Ranch, CA
- – Affordable Plumber Near Me Carmel Mountain Ran...
- – Plumbing Installation Services Carmel Mountai...
- – Affordable Plumber Near Me Carmel Mountain Ra...
- – Local Plumber Carmel Mountain Ranch, CA
- – Plumbing Installation Near Me Carmel Mountai...
- – Local Plumbing Near Me Carmel Mountain Ranch...
- – Shower Repair Near Me Carmel Mountain Ranch, CA
- – Residential Plumber Carmel Mountain Ranch, CA
- – Best Plumber Carmel Mountain Ranch, CA
- – Garbage Disposal Installation Carmel Mountai...
- – Water Heater Installers Carmel Mountain Ranc...
- – Plumbing Installation Carmel Mountain Ranch, CA
- – Local Plumbing Near Me Carmel Mountain Ranch...
- – Black Mountain Plumbing
Water Line Repair Carmel Mountain Ranch, CA
Black Mountain Plumbing
9909 Hibert Street Suite E San Diego, CA 92131(858) 536-4161
Black Mountain Plumbing
This step consists of cautious alignment to the sink drain, attaching water lines, and ensuring a leak-free arrangement for reliable garbage disposal. Conformity with local building ordinance and security guidelines is extremely important when you set up a waste disposal unit. These requirements are in location to ensure the safety and efficiency of electric and plumbing setups in household settings.
When intending to mount a waste disposal unit, it's crucial to recognize what the procedure involves. Before the actual installment, a first assessment is vital. This includes inspecting the existing sink setup, making sure there's adequate space under the sink for the disposal, and identifying if any type of added plumbing or electric alterations are required.
This includes separating it from the power source, separating it from the sink, and carefully removing any kind of connected pipes. Setting up a waste disposal unit generally begins with assembling the system according to the maker's guidelines. This includes affixing the placing ring, making sure proper alignment, and protecting it to the underside of the sink.
Kitchen Plumbing Carmel Mountain Ranch, CA
This need to be performed in conformity with electrical security criteria and might require the skills of an electrician if direct wiring is needed. Linking the disposal to the plumbing system is a vital action. This includes affixing the drainpipe lines, ensuring the dishwashing machine drainpipe is attached if applicable, and making sure all links are limited and leak-free.
You can mount the installing brace that will hold up your disposal. You can install the disposal and hook it up to the drain pipes.
Affordable Plumber Near Me Carmel Mountain Ranch, CA
Lift the disposal slightly and loosen the lower mounting ring by pressing or drawing wrenches or screwdriver to the left up until the disposal is cost-free from installing assembly. Lay the disposal on its side and eliminate the electrical cover plate. Loose the green ground screw and get rid of the wire adapters.
Loosen up screws on the electrical clamp port and remove wires from the disposal. Pry the breeze ring off with a screwdriver and remove the old installing assembly, then press the old sink flange up through the sinkhole.
Plumbing Installation Services Carmel Mountain Ranch, CA
Drop the new sink flange right into the drainpipe opening and press it into area. Placing a weight such as your disposal on top of the sink flange will assist hold the sink flange in place while installing the sink flange to the sink. To avoid scratching your sink or the flange, position a towel between the sink surface and the weight from under the sink.
Next, remove the loose knockout plug from inside of the disposal. Lay the disposal on its side under the sink so you can make the electric links. Make sure the circuit breaker is off. Eliminate the plate under of the disposal to subject the electrical wiring and usage cable connectors to connect the wires from the disposal to the matching cables from the power supply.
Change home plate, to cover the cords. All development versions mount in a similar way, though there are a few extra steps with the cover control, more on that momentarily. For all versions other than cover control, hang the disposal by straightening the 3 mounting tabs with the slide up ramps on the placing ring.
The disposal will certainly now hang on its own. Insert the discharge tube into the discharge coupler, then move the clamp over the discharge tube and setting it in the groove over the rubber tailpipe coupler. Revolve the disposal to ensure that the discharge tube is aligned with the drainpipe trap. If the discharge tube is too long, removed as a lot of the tube as essential.
Affordable Plumber Near Me Carmel Mountain Ranch, CA
If you are linking the disposal to a dish washer it may be linked with an air space. Utilize a pipe clamp to connect the drainpipe pipe to the dish washer inlet. Since whatever is set up and ready, lock the disposal to the sink placing assembly using the unique wrench that featured the unit.
For the cover control model, the sink baffle was implemented at the factory. If it has been removed, it would be much less complicated to insert it now prior to placing the system. Hang the disposal by aligning the 3 installing tabs with the slide up ramps onto the installing ring.
The disposal will certainly currently hang by itself. Revolve the disposal so that the discharge tube is aligned with the drain trap.
Local Plumber Carmel Mountain Ranch, CA
If you are connecting the disposal to a dishwashing machine it may be connected to an air space. Use a hose pipe clamp to affix the drainpipe tube to the dishwasher inlet. Since every little thing is set up and in position, lock the disposal to the sink installing assembly making use of the unique wrench that featured the system.
It breaks into put on 2 of the three screws on the mounting setting up. For all models, you need to evaluate for leaks at the sink flange dishwasher tailpipe and installing setting up links. Transform on the electrical breaker to evaluate its operation.
Plumbing Installation Near Me Carmel Mountain Ranch, CA
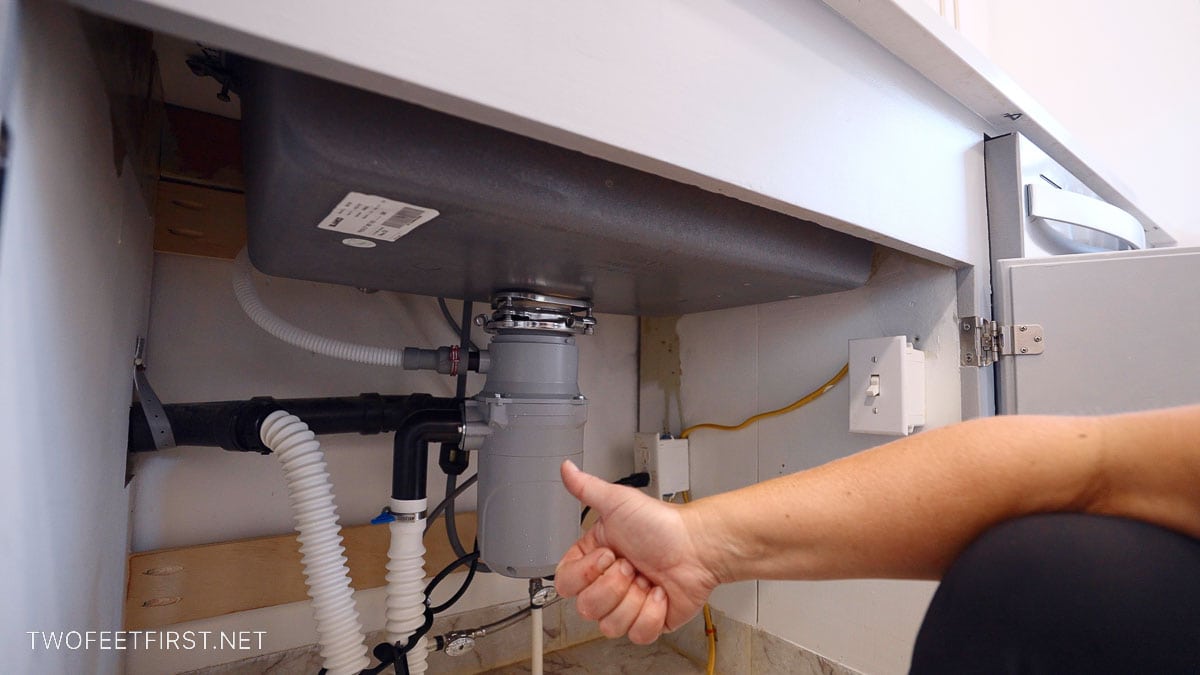
The waste disposal unit is a kitchen area appliance that helps in the disposal of food waste. It is vital to have a functioning garbage disposal. If your trash disposal quits working, you can easily replace it. Below are fundamental steps to aid you change a waste disposal unit by yourself. The initial step in changing a waste disposal is detaching the pipelines from your old unit and removing them from your sink or kitchen counter.
Detach the source of power from the rubbish disposal. Transform the device over, and inspect the base for the round or square faceplate. This serves as the electric home cover. Get rid of the green screw from the faceplate and area the copper ground cable over it. To remove the tinted wires from the main power source, pinch the plastic wire connections.
One of the most important thing to keep in mind is that a lot of them should obtain changed. The primary step in replacing a damaged placing assembly is to establish if there is any damages to the mounting ring and flange. It will require to be changed if it has actually been broken or broken.
Local Plumbing Near Me Carmel Mountain Ranch, CA
To do this, shut off the power to your waste disposal unit and activate the water to your sink. If necessary, switch off the water supply to your dishwashing machine and other sinks to stop flooding if something fails. Loosen the nut holding back a sink flange with a wrench or pliers so it can be eliminated from its mounting place.
With a flathead screwdriver, eliminate old sink flanges by pushing in on them with your fingers while they are still attached to their installing hardware. Relying on what sort of waste disposal unit you have set up in your cooking area, there might be greater than one type of flange, yet most will have 2 screws that protect them to their placing openings in an electrical outlet.
Making use of a huge wrench, loosen up the bolts holding the sink flange to the sink. When you have actually detached your sink flange and the drain line, eliminate any kind of particles inside it.
Shower Repair Near Me Carmel Mountain Ranch, CA
Add a couple of drops of dishwashing liquid into this location to aid loosen up any type of staying product from inside the pipe. This allows any kind of loosened material to travel through less complicated. Link the brand-new install. Slide the rubber gasket over all-time low of your new sink flange first, after that a 2nd steel flange, operating in reverse order this time around.
With one hand holding the setting up in position, make use of the various other to tighten the screws against the lower flange. Below are the tips for the last setup action. Protect the replacement disposal onto the mounting ring: The installing ring is a large ring that sits below your sink and holds the disposal.
Residential Plumber Carmel Mountain Ranch, CA
Reattach the electrical cords: The electrical wires for your disposal are located under a rubber cap affixed with Velcro strips. Reattach them to their equivalent terminals on your new device, after that reconnect them to their matching terminals on your electric box.
Open the faucet and let the water flow for 15 to 20 secs. Make sure no water leaks from connection points surrounding the brand-new unit while running. You shouldn't experience any kind of concerns as long as each element has actually been installed well. Utilize a line of Teflon pipe joint substance or a strip of string seal tape to secure any little leaks you discover.
Best Plumber Carmel Mountain Ranch, CA
If essential, trim the discharge tube. There's a significant possibility that the discharge tube won't be the appropriate size to connect to the ground plumbing shutoff if you've updated to a bigger disposal or among a different kind. Luckily, this is a simple repair work; mark the area on television where it ought to align with the drainpipe pipeline and utilize a hacksaw to trim it to dimension.
When you are done with the installation, turn the rubbish disposal breaker to the "On" setting. Return to the kitchen area and turn on the disposal with the switch.
Call a qualified plumbing professional to look at the brand-new disposal if it is making strange noises or does not appear to be working effectively. There can be a trouble with the gadget's interior devices. If you are trying to find specialist and reputable plumbing service in Newburgh, NY, you can count on Polar Plumbing, Heating & A/c.
Garbage Disposal Installation Carmel Mountain Ranch, CA
Setting up a new waste disposal needs cautious consideration of various variables to keep optimum cooking area functionality. Consulting with a local plumber helps property owners choose concerning disposal choice and installment demands.
Dimensions need to account for pipes connections and electrical requirements. Many disposals require specialized electrical circuits - Residential Plumbing Services Near Me Carmel Mountain Ranch. Specialist installation by a regional plumbing professional includes correct electrical connections and security verification.
Water Heater Installers Carmel Mountain Ranch, CA
Different designs utilize various grinding devices. Continual feed units operate while water runs, while set feed designs need covers for procedure. Each type uses distinct advantages relying on usage patterns. Multi-stage grinding provides even more extensive waste handling. Advanced systems decrease strain on plumbing while improving efficiency. Expert installment optimizes grinding efficiency via appropriate adjustment.
A local plumber can show correct cleaning methods and precautionary maintenance. Routine professional solution prevents expensive repair services. The first purchase rate stands for just component of the complete installment price. Professional installation, necessary modifications, and prospective upgrades impact total expenses. Quality installment prevents future repair expenses. A DIY approach might save cash ahead of time yet may call for extra maintenance fees and repair work in the future.
In many cases, a waste disposal that hums or seems like steel grinding on steel is a sure-fire indication that it's time to change it. A trash disposal that isn't functioning right might be revitalized with an easy solution. Here are a few things to try prior to running to the hardware shop and acquiring a brand-new system.
Use a flashlight to look for items that may have gotten lodged, and get them with a set of tongs or needle-nose pliers. Second, look underneath the waste disposal unit and situate the opening directly in the center. Using a hex wrench or a basic Allen wrench, rotate the wrench back and forth to manually reset the electric motor.
Plumbing Installation Carmel Mountain Ranch, CA
If none of these approaches function, it's time to go ahead and change the trash disposal. Unlike other home renovation jobs that might need a variety of special devices, to change a rubbish disposal, you'll generally need devices you probably already have on hand.
It's a good idea to take an image of your existing waste disposal unit so you can make certain you're replacing each item in the ideal order. Open up the box with the brand-new rubbish disposal inside. Verify that it includes all of the items that correspond the old unit.
As with any type of home improvement project, keep safety in mind. Head to your main circuit breaker and switch off power to the unit. There might be a breaker devoted to the rubbish disposal, or you may need to shut off power to the entire cooking area. You'll currently be able to begin working without the threat of electrical shock.
Local Plumbing Near Me Carmel Mountain Ranch, CA
Eliminate the old filter to the trash disposal. Situate the slim metal ring on the old garbage disposal.

Different the disposal from the power supply by turning the system over and locating the faceplate for the electrical real estate. Get rid of the sink flange by shaking or pressing below the flange and raising it out from the top.
Black Mountain Plumbing
Address: 9909 Hibert Street Suite E San Diego, CA 92131Phone: (858) 536-4161
Email: [email protected]
Black Mountain Plumbing
Apply plumbing professional's putty to the underside of the brand-new sink flange. Press on the slender end of the flange versus the drain opening and press the flange in position. Hold the new flange in position for a minimum of 30 secs so the putty can adhere correctly. Since you don't want the brand-new flange to change while you're installing the new rubbish disposal, ask an assistant to securely weigh down on it while you're functioning.
Best Plumber Carmel Mountain Ranch, CANear Me Plumber Carmel Mountain Ranch, CA
Residential Plumbing Repair Near Me Carmel Mountain Ranch, CA
Shower Repair Carmel Mountain Ranch, CA
Residential Plumbing Contractors Near Me Carmel Mountain Ranch, CA
Plumbing Installation Services Carmel Mountain Ranch, CA
Gas Line Plumber Carmel Mountain Ranch, CA
Garbage Disposal Installation Carmel Mountain Ranch, CA
Local Plumber Carmel Mountain Ranch, CA
Shower Repair Near Me Carmel Mountain Ranch, CA
Local Plumbing Near Me Carmel Mountain Ranch, CA
Plumbing Installers Near Me Carmel Mountain Ranch, CA
Affordable Plumber Near Me Carmel Mountain Ranch, CA
Bathroom Plumber Carmel Mountain Ranch, CA
Water Filtration Services Near Me Carmel Mountain Ranch, CA
Kitchen Plumbing Carmel Mountain Ranch, CA
Residential Plumbing Contractors Near Me Carmel Mountain Ranch, CA
Residential Plumbing Repair Near Me Carmel Mountain Ranch, CA
Plumber Company Near Me Carmel Mountain Ranch, CA
Plumber Toilet Repair Carmel Mountain Ranch, CA
Best Plumbing Carmel Mountain Ranch, CA
Garbage Disposal Installation Carmel Mountain Ranch, CA
Plumbers In Carmel Mountain Ranch, CA
Water Line Repair Carmel Mountain Ranch, CA
Affordable Plumber Near Me Carmel Mountain Ranch, CA
Plumber Toilet Repair Carmel Mountain Ranch, CA
Shower Repair Carmel Mountain Ranch, CA
Residential Plumber Carmel Mountain Ranch, CA
Plumber Toilet Repair Carmel Mountain Ranch, CA
Water Line Repair Carmel Mountain Ranch, CA
Water Heater Installers Carmel Mountain Ranch, CA
Plumbers In Carmel Mountain Ranch, CA
Plumber For Clogged Toilet Near Me Carmel Mountain Ranch, CA
Water Line Repair Carmel Mountain Ranch, CA
Gas Line Plumber Carmel Mountain Ranch, CA
Residential Plumbing Contractors Near Me Carmel Mountain Ranch, CA
Water Leak Repair Carmel Mountain Ranch, CA
Plumber For Clogged Toilet Near Me Carmel Mountain Ranch, CA
Plumber Company Near Me Carmel Mountain Ranch, CA
Gas Line Plumber Carmel Mountain Ranch, CA
Plumber For Clogged Toilet Near Me Carmel Mountain Ranch, CA
Near Me Plumber Carmel Mountain Ranch, CA
Kitchen Plumbing Carmel Mountain Ranch, CA
Residential Plumbing Repair Near Me Carmel Mountain Ranch, CA
Shower Repair Carmel Mountain Ranch, CA
Residential Plumbing Contractors Near Me Carmel Mountain Ranch, CA
Plumbers In Carmel Mountain Ranch, CA
Best Plumbing Carmel Mountain Ranch, CA
Plumber Shower Installation Carmel Mountain Ranch, CA
Local Plumber Carmel Mountain Ranch, CA
Local Plumber Carmel Mountain Ranch, CA
Water Filtration Services Near Me Carmel Mountain Ranch, CA
Water Heater Installers Carmel Mountain Ranch, CA
Best Plumber Carmel Mountain Ranch, CA
Residential Plumbing Services Near Me Carmel Mountain Ranch, CA
Plumbing Installation Near Me Carmel Mountain Ranch, CA
Local Plumber Carmel Mountain Ranch, CA
Plumber Company Near Me Carmel Mountain Ranch, CA
Plumber Toilet Repair Carmel Mountain Ranch, CA
Local Plumber Carmel Mountain Ranch, CA
Garbage Disposal Installation Carmel Mountain Ranch, CA
Shower Repair Near Me Carmel Mountain Ranch, CA
Kitchen Plumbing Carmel Mountain Ranch, CA
Best Plumber Carmel Mountain Ranch, CA
Local Plumbing Near Me Carmel Mountain Ranch, CA
Plumbing Installation Carmel Mountain Ranch, CA
Plumber For Clogged Toilet Near Me Carmel Mountain Ranch, CA
Plumbing Installation Carmel Mountain Ranch, CA
Plumber Company Near Me Carmel Mountain Ranch, CA
Gas Line Plumber Carmel Mountain Ranch, CA
Shower Repair Carmel Mountain Ranch, CA
Water Filtration Services Near Me Carmel Mountain Ranch, CA
Plumbing Installation Carmel Mountain Ranch, CA
Plumber Company Near Me Carmel Mountain Ranch, CA
Water Heater Installers Carmel Mountain Ranch, CA
Plumber Company Near Me Carmel Mountain Ranch, CA
Water Heater Installers Carmel Mountain Ranch, CA
Near Me Plumber Carmel Mountain Ranch, CA
Plumber Shower Installation Carmel Mountain Ranch, CA
Plumbing Installation Near Me Carmel Mountain Ranch, CA
Near Here Seo Company Carmel Mountain Ranch, CA
Local Seo Pricing Carmel Mountain Ranch, CA
Black Mountain Plumbing
Table of Contents
- – Water Line Repair Carmel Mountain Ranch, CA
- – Black Mountain Plumbing
- – Kitchen Plumbing Carmel Mountain Ranch, CA
- – Affordable Plumber Near Me Carmel Mountain Ran...
- – Plumbing Installation Services Carmel Mountai...
- – Affordable Plumber Near Me Carmel Mountain Ra...
- – Local Plumber Carmel Mountain Ranch, CA
- – Plumbing Installation Near Me Carmel Mountai...
- – Local Plumbing Near Me Carmel Mountain Ranch...
- – Shower Repair Near Me Carmel Mountain Ranch, CA
- – Residential Plumber Carmel Mountain Ranch, CA
- – Best Plumber Carmel Mountain Ranch, CA
- – Garbage Disposal Installation Carmel Mountai...
- – Water Heater Installers Carmel Mountain Ranc...
- – Plumbing Installation Carmel Mountain Ranch, CA
- – Local Plumbing Near Me Carmel Mountain Ranch...
- – Black Mountain Plumbing
Latest Posts
Truck Service Center Villa Park
Awnings For Trailers La Habra
Paint Rv Mira Loma
More
Latest Posts
Truck Service Center Villa Park
Awnings For Trailers La Habra
Paint Rv Mira Loma