All Categories
Featured
Table of Contents
Paint Rv Eastvale, CA
If you're bound and established to eliminate the experts and make this a DIY project, this little overview will certainly set you on the best track. A rig with a fresh coat of outside motor home paint is an attractive thing, specifically if you're accountable for it. Outside paints, especially in RV and marine applications, come with a level of scientific refinement.
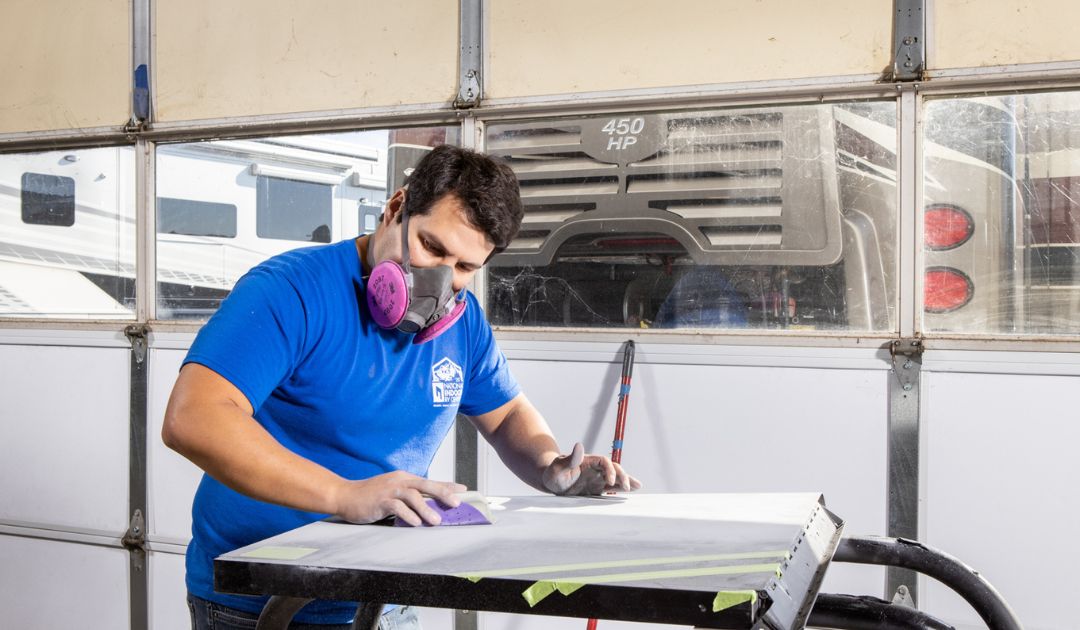
When you atomize your paint with an HVLP or airless sprayer, it requires to bond to the surface area at a molecular degree. Without correct prep work, it can not bond - Rv Paint And Body Shops Near Me Eastvale. The outcomes will look wonderful, a minimum of up until the first bump comes and a whole sheet of paint falls off. Preparation is vital long prior to you begged the paint aisle at the equipment shop.
It's commonly less regarding the product of the sidewalls and more concerning the original paint. Most consumers jumping on the DIY paint job bandwagon are enhancing an existing aesthetic, not painting the raw fiberglass or light weight aluminum surface of a Motor home.
Rv Painter Eastvale, CA

If you are painting the raw surface, we've got you covered there also. Your substrate will practically constantly be old paint unless you happen to be repainting Recreational vehicles as they come off the assembly line. There are 2 things you require to recognize that are of the utmost value in regards to paint durability, long life, and a fantastic visual: surface preparation and bonding guide.
Yes, it will increase the expense of a DIY RV paint task, but it will certainly additionally save you a great deal of cash and heartache in the near future. Acrylic is a solid selection as an exterior Motor home paint, particularly if you're repainting the raw surface area of a light weight aluminum RV.
Since acrylic is a slim paint, it will usually cost even more for the additional finishings. Polymer is normally made use of as a combo for outside paints, such as acrylic-enamel.Latex is a water-based paint and, for the lengthiest time, oil-based paints have constantly been the go-to RV exterior paint of selection, or outside anything, for that issue.
Painting Rv Exterior Eastvale, CA
It dries gradually, however it likewise dries out hard, creating a safety shell. Its sluggish drying out time makes painting errors fixable.
Quickly among the most flexible finish layers on the checklist, one-part polyurethane collaborate with timber, fiberglass, steel, aluminum, and plastics. It provides UV security and reduces the requirement for waxing, thanks to its glossy surface. It likewise enhances aerodynamic efficiency and is a strong waterproofing option. Surface area preparation for polyurethane is an exquisitely thorough and patient procedure, however.Two-part polyurethane has all the benefits of one-part polyurethane, other than the coating is harder, has a higher gloss appearance, and is far more expensive.Epoxy paints are the key outside paints in U.S.If you're opting for a super-glossy look, water-based is the incorrect selection. Exterior motor home paint is everything about surface preparation. Without surface area preparation, your overcoat may too be made of cotton sweet. Because that has to do with what you'll obtain out of ita extremely colorful and appealing aesthetic, rapidly followed by spoil, despair, and relocating back in with your in-laws. With proper surface area prep, the exterior-grade paint you select will
be just how your recreational vehicle occurs to the world. There are a great deal of difficult choices in the above listing, and RVers will all more than happy to tell you their own individual choice. Eventually, it's a matter of obtaining what you spend for. But that's not to say the various other options are incorrect, simply less effective in regards to longevity . Marine quality may seem like it has nothing to do with Motor homes, yet it does, in most methods. Boats and RVs share many typical attributes. Some are light weight aluminum, and some are fiberglass. Both need UV defense, waterproofing, deterioration resistance, versatility, and a desirable aesthetic. While temperature influences the curing procedure of external motor home paint, there's still a window in which a lot of paint applications are optimal. You're excellent to go in temperatures anywhere in between 50F and 85F. Before you start, take note of the climate, specifically if you pick an oil-based paint. Given that they heal slower, the window for catastrophe is bigger. That will certainly be harder near the Gulf of Mexico, the Pacific Sea, or the Atlantic Ocean . In those instances, find an indoor facility, head inland, or wait until the fall. Avoid windy problems whenever possible, specifically if you're going to use a paint sprayer. This is where all the enjoyable scientific research stuff begins. While bonding primer is commonly assumed of as the supreme necessity for a solid top coat to stick, it's.
Rv Paint And Repair Eastvale, CA
not. It's extremely crucial, however it's not the end-all-be-all of the procedure. Not just do you need to sand every square inch of surface on your motor home, however you also have to sand your bonding guide. The majority of bonding guides will offer you with a 7-day window for optimum topcoat adherence. When you return, use 220+ grit sandpaper to gently open up the guide and get rid of any kind of imperfections. Don't dig as well deep with the sandpaper, as you do not desire to mistakenly eliminate the bonding primer. The path to creating the very best outside recreational vehicle paint task begins and ends with a sprayer. The problem is not every person fits using one. Hold that trigger for too long or obtain the idea too near to the surface, and things go.
southern quickly. If you like to utilize a roller, a three-inch, high-density foam roller is the very best option. It generates the best coating without leaving behind tiny fibers that originate from woollen rollers. This is vital to an effective surface. You should only make use of paint brushes for difficult-to-access locations and stick to the foam kind instead of the bristles. The bristles have a tendency to leave tiny rows behind, which looks negative when it remedies. No matter what you do, don't overdo it. Gravity antagonizes paint, simply like everything else. Area the suggestion about 8 to 12 far from the surface area and move swiftly with overlapping rows. The woman's rate (in the above video) is proper, yet, at times, her technique is not. At the 2:01 -minute mark, her method is ideal, preserving an equivalent distance backwards and forwards the paint surface area. It might sound trivial, yet it creates entire rows of slim paint that sandwich rows of thick paint between them. Make certain that there will certainly be no damaging climate occasions, to the finest of your ability, in the 24 hours following your paint work. For high-gloss or high-sheen coatings, do not wax it. For low-gloss or low-sheen paint jobs, do not hesitate to wax the finished item. The ideal way to maintain the visual and general allure of your external recreational vehicle paint work is to frequently clean it. You do not need to go all wild and wash it every two or 3 days. Simply establish a regular and keep it clean. A do it yourself exterior recreational vehicle paint work isn't as luxurious and refreshing as it appears. Fortunately is that nothing that looks wonderful ever before originates from little initiative. You can always obtain a professional to do it. There are aquatic commercial painters and vehicle detailers that would certainly like to do it. Plus, we share leading product referrals so your camper comes out looking fresh. For referral, I utilized of base color to paint approximately. That lines up with the estimated required for complete insurance coverage. This included, with some overlap and regular overspray waste. Below is a basic quote of just how much paint you'll require to cover the. To offer both rigs a fresh new look, this is the external paint strategy that we advise. Desire to look into both renovations? Below is the 2007 Keystone Hornet and the 2005 Keystone Hornet. Right here is exactly how to repaint your motor home's exterior. 1 Start by offering your recreational vehicle a great laundry to eliminate any type of dust, dust, or roadway crud.
Motorhome Painting Near Me Eastvale, CA
Ensure to wash extensively so no soap or deposit is left behind. Then, let the motor home prior to going on to the following stepthis helps your tape stick better and protects against moisture from getting caught under paint. 2 they'll trigger the paint to peel off and leave an uneven coating. Utilize a warm gun to carefully heat the plastic. This softens the sticky and makes removal less complicated. Start at one corner and slowly pull it off. A 3M decal remover device can be a significant helpespecially for old, sun-faded stickers that are breakable or stuck on limited. Rub out any kind of sticky residue with a cloth and Goof Off, a sticky remover, or even orange important oil (which functions surprisingly well! ). 3 Before you paint, it's a fantastic idea to eliminate any plastic fixtures or trim piecesespecially if your motor home is older. With time, parts like can become discolored, brittle, or split from sun exposure. This is an ideal time to change them with(you can find plenty at RecPro ). I likewise suggest getting rid of the and repainting them separately. Rv Paint And Body Shops Near Me Eastvale. To eliminate the hatch doors, just unscrew one end of the joint and. Peel off any type of old from the framework, and once whatever is painted and completely dry, change it with a fresh gasket for a tighter seal and a polished appearance. 4 Much like when painting the interior of your RV or your home, you'll desire to such as home windows, lights, trim, door manages, vents, and any kind of devices you could not get rid of. It allows you use painter's tape and covering up movie with each other, which.
conserves time and helps you obtain clean, straight lines. Usage masking movie to cover larger locations and safeguard them from overspray. Press the sides down firmlyespecially around seams and hardwareto maintain paint from slipping beneath. If you're getting rid of parts like air vent covers or light fixtures, snap a quick picture before taking them off. Usage or a sanding block to. The goal here isn't to get rid of layersjust to boring the shiny finish and offer the new paint something to hold onto. Take your time and work uniformly throughout the surface. This step is key for aiding (or any vehicle paint) stick properly and providing you a smooth, long-lasting finish. 6 After sanding, it's important to completely clean up the surface area prior to you start paint. with acetone and a to remove any type of oils, oil, or deposit that can protect against the paint from sticking. with a to grab fining sand dust. to catch any type of remaining fragments for a clean, paint-ready surface area. Make certain the surface area is entirely dry before going on to guide. 7 With your surface tidy and prepped, it's time to use the guide. Making use of a, use a light, also layer to all areas you plan to repaint. Guide develops a smooth, consistent base and aids the paint stick properly. Avoid paint in straight sunshine, on gusty days, or when dust remains in the airthese problems can influence how the guide dries out and can cause a harsh or uneven surface. 8 Currently it's time to bring your recreational vehicle's makeover to life! Making use of a, use the base color in smooth, even passes. For the very best results, follow these steps: Use a light, even layer using. Maintain the sprayer about and preserve a to stay clear of lap marks. Let the paint completely dry totally according to the supplier's directions. This assists the following coat stick better and smooths out any kind of tiny imperfections. Wipe every little thing down with a to get rid of any type of dirt. Then make use of a to choose up any type of staying bits. Use a second layer utilizing the very same method. If the paint still looks uneven after drying, duplicate the scuffing and cleaning process, after that apply a 3rd coat if needed. Once the paint is totally healed(follow the timeline on your Dupli-Color or picked product), you can to enhance the luster and offer it a tidy,
professional look. Wait up until the paint is fully treated before buffingrushing this step can boring or harm your coating. Remember to correctly prep the outside surface area to ensure that the paint has something to follow. It's an olden concern. Do you take your RV to a personalized paint shop or opt for a DIY recreational vehicle paint task? As a motor home proprietor, it's a concern that you ultimatelyneed to face when your recreational vehicle's exterior starts to use. There's no right or incorrect answer when it pertains to selecting an expert recreational vehicle paint job or going the do it yourself paint course. The most likely factor a person selects to go DIY is due to the expense element. Depending on the size and design, the typical recreational vehicle paint job can vary from $5,000-$15,000+. Painting a RV on your very own, nevertheless, can be as cheap as $300 if you agree to spend the moment and effort. If you can save the joint grease, you can do the labor yourself and conserve cash at the same time. With aid from the net, you can discover to achieve anything. There's a wide range of expertise to direct you detailed through the process of paint your motor home. You can pull up a written guide on your phone(or print them out )or you can comply with in addition to a YouTube video clip. While it may seem intimidating to look through, with perseverance and decision, you can use these resources to aid you transform your motor home exterior. When you determine to repaint your motorhome on your own, you have complete control over what happens. You determine what sort of paint and supplies are made use of. Be as flashy or as modest as you want. As long as you have the capability to, you can personalize your exterior to your preference. There's likewise a sense of success that includes taking on a big do it yourself task. You can't beat the feeling of standing back and feeling satisfaction in the effort you have actually placed in. When you most likely to a custom-made paint store, there's an expectation in the quality of the final product. That expectation originates from the experience and sources that a paint shop has to supply. Customized paint stores include staff membersthat are learnt a procedure that's been performed countless times. That procedure has actually been nailed down right into an effective regimen for the store workers. Not every individual is creatively inclined. And producing layouts for a motor home could be more difficult than expected. If you aren't the creative kind, a motor home paint shop will certainly have lotsof reliable designs and colors to choose from. They'll deal with you to get the most effective keep an eye out of your RV. [] While do it yourself is a cost-saving action, it will use up a good chunk of time to total painting your motor home. Estimated time to complete a DIY RV project can use up to 30 hours or even more. Those that work permanent may find it challenging to find the spare time beyond the weekend break to undertake repainting their mobile home. Inevitably, the choice is your own on how to care for your recreational vehicle. It's your vehicle and your journey. Simply be certain to take into consideration all your options when making that option. If you determine to obtain your paint done expertly and are seeking a costs, top notch service, take a look at CDI Custom-made Paint today and obtain a quote. We are still in the Madison, Wi. camping area at the FMCA rally. We consulted with people from Mike's Custom Painting in Bremen, In. Concerning doing a total repaint of our 1999 DSDP.From what they stated, and what you can see on their website, I have little doubt they would certainly do a first rate task. Quality of products and handiwork are what I'm trying to find. If you have comments you would certainly rather not upload on the forum, please send them to me at:! Bob. Thanks for all the replies. I'm in the onset of considering this, but the m/h requires it. I'm either mosting likely to have this done, or clean it up and offer it and get something a little far better- most likely willwait till springtime if I perform. I'm incredibly pleased with the remainder of the m/h, floorplan, mechanicals, etc, so I really would not mind maintaining this one. I recognize I'm going to obtain some flack for this and some individuals are mosting likely to tremble their heads and elevate some brows. I do not follow the policies for auto-body painting and maybe not also for camper paint. Below's why, That's right. I do not spray it, I do not use auto paint. Often I do not also remove the stickers(gasp!). Is it best? No. Is it way better than prior to? Yes. Am I shamed to be seen with it after it has been repainted? No. Was I formerly fretted about being misinterpreted for a mobile meth laboratory? Yes. Am I fretted concerning it currently? No. I always assess a task prior to diving in and making use of any type of one technique. I will always examine the stickers and effort to remove them first. If you want to try to remove the decals, you will desire to attempt the adhering to materials: The appropriate means to repaint a motor home outside includes eliminating stickers, power washing, taping and covering home windows and after that spraying on a vehicle grade paint with a paint sprayer. If you have actually been transformed away at specific campgrounds based upon your RV's look, you need to repaint. Right here is what I do to prep the surface area before painting: Gently sand locations where the stickers are gurgling or peeling up Power wash everything, consisting of the roof covering Enable to completely dry extensively Seal up corners and around all windows with a paintable caulk.
Rv Paint And Body Shops Near Me Eastvale, CA
I assume getting rid of decals from a smooth-sided trailer is less complicated. I will always check stickers and attempt to eliminate them, but if they look like they aren't going anywhere and the camper is even more than 20 years old, I will likely simply paint over them.
I think eliminating decals from a smooth-sided trailer is much easier. I will certainly constantly evaluate decals and attempt to remove them, but if they look like they aren't going anywhere and the camper is even more than 20 years old, I will likely just repaint over them.
Custom Rv Paint Jobs Eastvale, CA
Those points would certainly NOT come off. Currently, the siding on that particular specific trailer was curly, not smooth. I assume removing decals from a smooth-sided trailer is much easier. I pledged that day never ever to lose that much time once more. I will constantly evaluate decals and attempt to remove them, yet if they look like they aren't going anywhere and the camper is greater than two decades old, I will likely just paint over them.
I assume removing stickers from a smooth-sided trailer is much easier. I will certainly constantly inspect decals and effort to remove them, however if they look like they aren't going anywhere and the camper is even more than 20 years old, I will likely simply paint over them.
OCRV Center
Address: 23281 La Palma Ave Yorba Linda, CA 92887Phone: (714) 909-1444
Email: [email protected]
OCRV Center
Those points would NOT come off. Now, the exterior siding on that specific trailer was bumpy, not smooth. I think eliminating decals from a smooth-sided trailer is simpler. I swore that day never to squander that much time once more. I will constantly examine decals and effort to eliminate them, however if they resemble they aren't going anywhere and the camper is more than 20 years old, I will likely just repaint over them.
Rv Paint Eastvale, CAPainting Fiberglass Motorhome Eastvale, CA
Custom Rv Paint Eastvale, CA
Rv Paint Job Eastvale, CA
Painting Fiberglass Motorhome Eastvale, CA
Rv Painter Eastvale, CA
Rv Painter Eastvale, CA
Painting Fiberglass Motorhome Eastvale, CA
Class A Rv Custom Paint And Repair Eastvale, CA
Custom Painted Motorhomes Eastvale, CA
Paint Fiberglass Rv Eastvale, CA
Rv Exterior Paint Eastvale, CA
Custom Rv Paint Jobs Eastvale, CA
Painting Rv Eastvale, CA
Motorhome Painting Near Me Eastvale, CA
Class A Rv Custom Paint And Repair Eastvale, CA
Motorhome Painting Eastvale, CA
Painting Rv Eastvale, CA
Rv Paint Eastvale, CA
Motorhome Painting Eastvale, CA
Rv Paint Shops Near Me Eastvale, CA
Motorhome Paint Shops Eastvale, CA
Painting Rv Exterior Eastvale, CA
Rv Paint Shops Near Me Eastvale, CA
Rv Painting Eastvale, CA
Rv Exterior Paint Eastvale, CA
Motorhome Painting Near Me Eastvale, CA
Rv Paint Repair Eastvale, CA
Painting Rv Walls Eastvale, CA
Rv Paint Shops Near Me Eastvale, CA
Rv Paint And Body Shops Near Me Eastvale, CA
Rv Paint Repair Eastvale, CA
Motorhome Custom Paint Jobs Eastvale, CA
Rv Exterior Paint Eastvale, CA
Painting Rv Walls Eastvale, CA
Rv Paint Shops Near Me Eastvale, CA
Rv Paint Job Eastvale, CA
Paint Fiberglass Rv Eastvale, CA
Motorhome Custom Paint Eastvale, CA
Motorhome Custom Paint Jobs Eastvale, CA
Rv Exterior Paint Eastvale, CA
Rv Painting Eastvale, CA
Painting Rv Walls Eastvale, CA
Custom Rv Paint Jobs Eastvale, CA
Painting An Rv Eastvale, CA
Paint Fiberglass Rv Eastvale, CA
Painting Rv Eastvale, CA
Rv Painting Eastvale, CA
Rv Paint Eastvale, CA
Custom Rv Paint Jobs Eastvale, CA
Class A Rv Custom Paint And Repair Eastvale, CA
Painting Rv Eastvale, CA
Rv Paint And Body Shops Near Me Eastvale, CA
Painting Rv Eastvale, CA
Paint Fiberglass Rv Eastvale, CA
Custom Rv Paint Eastvale, CA
Rv Paint Eastvale, CA
Motorhome Custom Paint Eastvale, CA
Class A Rv Custom Paint And Repair Eastvale, CA
Rv Paint Repair Eastvale, CA
Painting Rv Eastvale, CA
Paint Motorhome Exterior Eastvale, CA
Paint Motorhome Exterior Eastvale, CA
Rv Painting Near Me Eastvale, CA
Custom Painted Motorhomes Eastvale, CA
Custom Rv Paint Jobs Eastvale, CA
Custom Painted Motorhomes Eastvale, CA
Custom Rv Paint Jobs Eastvale, CA
Rv Paint And Body Shops Near Me Eastvale, CA
Rv Paint Shop Near Me Eastvale, CA
Paint Rv Eastvale, CA
Rv Paint Job Eastvale, CA
Painting Rv Exterior Eastvale, CA
Rv Paint And Body Shops Near Me Eastvale, CA
Custom Rv Paint Jobs Eastvale, CA
Rv Paint Shops Near Me Eastvale, CA
Paint Fiberglass Rv Eastvale, CA
Motorhome Paint Shops Eastvale, CA
Around Here Seo Service Eastvale, CA
Around Here Seo Optimization Eastvale, CA
Rv Paint And Body Shops Near Me Eastvale, CA
OCRV Center
Latest Posts
Orange Fleet Maintenance
Travel Trailer Siding Repair East Irvine
Villa Park Rv Repair Shops Near My Location