All Categories
Featured
Table of Contents
- – Paint Fiberglass Rv Orange, CA
- – OCRV Center
- – Rv Painting Orange, CA
- – Painting Fiberglass Motorhome Orange, CA
- – Rv Paint And Body Shops Near Me Orange, CA
- – Rv Paint Repair Orange, CA
- – Rv Paint Shops Near Me Orange, CA
- – Rv Painting Near Me Orange, CA
- – Rv Paint And Repair Orange, CA
- – Rv Paint Shop Near Me Orange, CA
- – Rv Paint Job Orange, CA
- – Rv Painting Orange, CA
- – Painting Rv Walls Orange, CA
- – Motorhome Painting Near Me Orange, CA
- – Motorhome Custom Paint Orange, CA
- – Rv Paint Repair Orange, CA
- – OCRV Center
Paint Fiberglass Rv Orange, CA
I understand I'm going to get some flack for this and some individuals are mosting likely to shake their heads and increase some brows. I don't follow the regulations for auto-body painting and maybe not even for camper painting. Here's why, That's right. I do not spray it, I do not use car paint.
Occasionally I don't also get rid of the stickers (wheeze!). Is it way better than before? Am I embarrassed to be seen with it after it has been painted?
Rv Painting Orange, CA
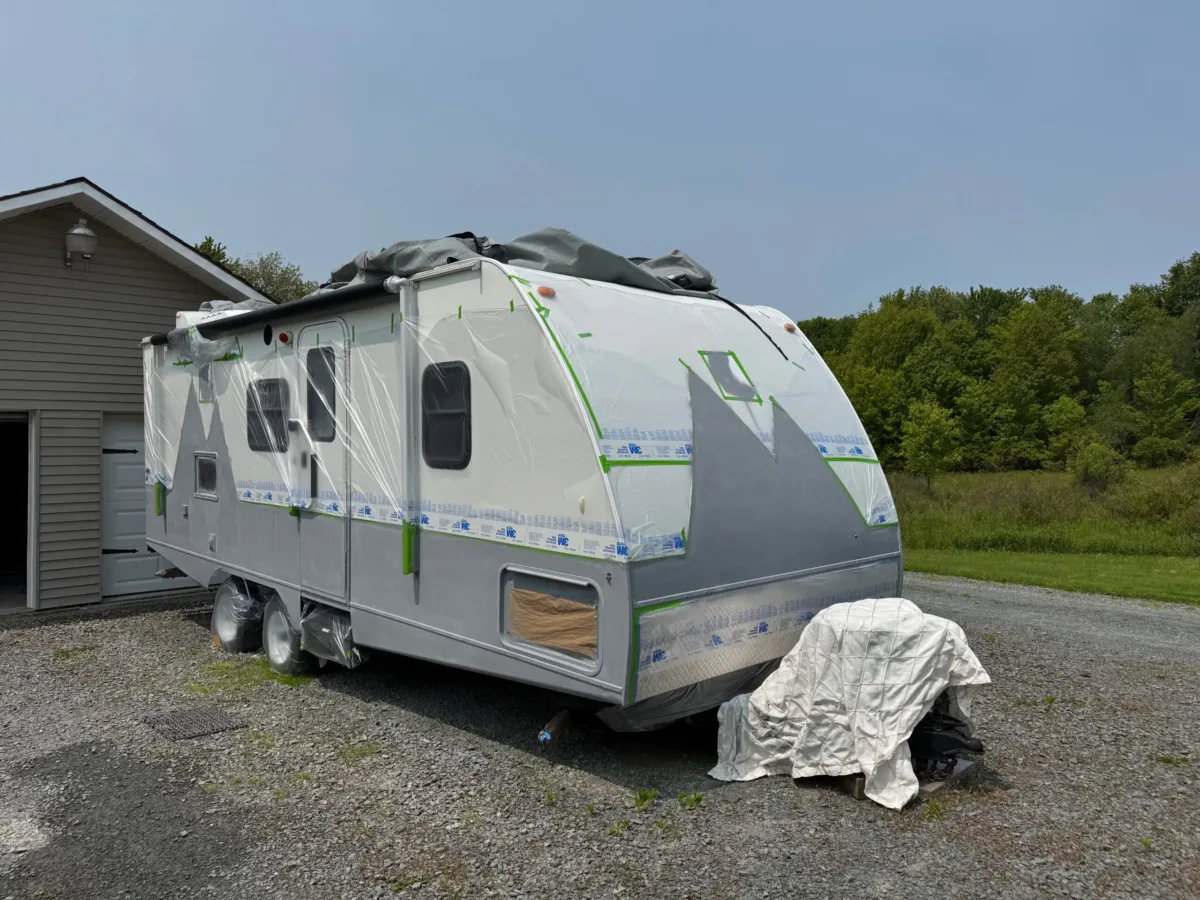
I constantly examine a task before diving in and making use of any type of one method. I will always inspect the decals and attempt to eliminate them first - Custom Painted Motorhomes Orange. If you want to attempt to get rid of the decals, you will certainly intend to attempt the complying with products: The correct method to paint a motor home outside entails getting rid of decals, power cleaning, taping and covering windows and after that spraying on a vehicle grade paint with a paint sprayer
If you have actually been averted at specific campgrounds based upon your recreational vehicle's look, you should paint. Right here is what I do to prep the surface area before paint: Gently sand locations where the stickers are bubbling or peeling off up Power clean everything, consisting of the roofing system Permit to dry extensively Seal up edges and around all home windows with a paintable caulk.
Painting Fiberglass Motorhome Orange, CA
I think eliminating decals from a smooth-sided trailer is simpler. I will certainly constantly check stickers and attempt to eliminate them, however if they look like they aren't going anywhere and the camper is more than 20 years old, I will likely just paint over them.
Our much older motor home with smooth sides is holding well. The newer trailer with bumpy sides began to raise a little and I had to repair the paint. I think more recent decals might eventually bubble and lift, however if your motor home is older than two decades, they sit tight.
Rv Paint And Body Shops Near Me Orange, CA
I constantly suggest using a great gripping guide initially, due to the fact that it's difficult to predict how well paint will certainly abide by various surfaces. If you are repainting right over an aluminum-sided trailer, you will certainly desire to make use of a guide that is suggested for direct-to-metal application. With that claimed, I have had respectable success with Behr Marquee exterior paint and guide in one.

It has actually virtually constantly been covered in one coat and stood up well. I made use of a low luster shine (eggshell) on the outside of our 50's vintage trailer due to the fact that there were a lot of dents and imperfections in the siding and I desired a coating that would certainly camouflage them much better. The disadvantage to this is that dirt does not glide off or wipe as wonderful as a high gloss.
Rv Paint Repair Orange, CA
I was hesitant to paint over the decals on our current Recreational vehicle with a semi-gloss paint, but I desired to see if a semi-gloss would show up more expert. Grasping Guide Latex Paint 3/8 nap roller (you could likewise utilize 1/4 snooze or a foam roller for a smoother coating) Tilted brush * I tried out with an oil based paint when and it split and flaked off!
Ultimately, I just went all out and never ever recalled! Why did I select to roll the paint rather of splashing it? Well, I'm just much more confident with a roller. I've never been a fan of taping and covering whatever up to safeguard it from the over spray.
Rv Paint Shops Near Me Orange, CA
Would certainly a sprayer create an even more also, smooth coating? Most likely, yes. But, due to the fact that of painting over the stickers, I have always figured the roller will produce a slightly textured surface that will hide the stickers. As soon as the paint has actually dried and treated, I added enjoyable plastic decals! I saw to it the surface area was clean and dry prior to using.
I likewise got a fun vanity plate for the front of the camper. I additionally repainted the door pink! I am constantly asked exactly how well this method holds up. In my experience, you may have little spots that require touching up after a season of traveling, but overall it holds well.
Rv Painting Near Me Orange, CA
These high website traffic areas take rather a beating, however however, I have actually only ever seen light breaking happen with time. Overall, I feel that the enhancement I obtain from painting and convenience of this approach deserve a few little chips here and there. I constantly keep paint on hand for touch ups.
A ladder helps, also. When we initially came to be full-time RVers, I believed I would not need a ladder since there was one on the back of our RV. I discovered it very challenging to scrub the nose of our fifth wheel as it was also low to get to from the roofing and also high to reach from the ground.
The "swoosh" design sticker is also not the only option out there.
These can be put on the side or back of a RV (or both). The individuals who refurbished this RV. Custom Painted Motorhomes Orange made a decision to paint the door eco-friendly after they eliminated the decals. They utilized Behr Marquee Exterior house paint, which they say has actually held up on their motor home for over four years without touchups required.
Rv Paint And Repair Orange, CA
Decal elimination may trigger a noticeable difference in color around that area. The image listed below shows this issue.
Completely wash the exterior. Make use of a degreaser if required on especially filthy areas. Gently sand the exterior to assist with paint attachment. Apply primer, then paint. Several of the owners of the Motor homes visualized listed below told me they adhered to this tutorial, which goes right into much more information. As for the most effective sort of paint and guide to utilize for painting a recreational vehicle exterior, it seems there are a number of great selections.
Check out these campers with painted exteriors for inspiration! We began by getting rid of the stickers with a rubber add-on, which was probably the largest task.
We evaluated a few paint alternatives, however I think we opted for Kilz exterior guide, adhered to by the Behr outside paint and guide. Then we utilized Behr exterior for the mountainscape too." Image Credit rating: The travel trailer listed below was painted with BeautiTone patio and flooring interior/exterior latex paint. The proprietor states, "It's been 4 years with harsh Canadian wintertimes, and the fiberglass looks fantastic!" Picture credit: To repaint the environment-friendly, gray, and white motorhome in the picture listed below, the owners made use of Behr Marquee exterior residence paint. They claimed they have actually had no issues with it flaking or peeling thus far.
Rv Paint Shop Near Me Orange, CA
They claim the paint has held up well despite the RV being stored outdoors in Minnesota year-round. They claimed the only point they would certainly do differently if they had the project to do over would be to utilize a semi-gloss paint sheen instead of the flat/matte coating they picked to make it simpler to cleanse.
Below is a side-by-side of what this travel trailer looked like before and after its makeover. It truly reveals how much a difference paint your Motor home can make!
They utilized Rust-Oleum specialist interior/exterior oil-based commercial enamel paint in level black. They feel the flat black paint is difficult to keep clean and would certainly suggest a shiny sheen. However the client they renovated this camper for insisted on the flat surface, and I need to admit, it does look fantastic! Picture debt: Here's a fun one! Rachel of @RV. Household.
Rv Paint Job Orange, CA
She created in an Instagram message that she initially utilized this paint strategy on the fridge inside the camper. She later on made a decision to repaint the exterior to match! She claimed: "My driveway is officially damaged, but the art trailer is remarkably remarkable. And I'll ruin my driveway over and over to make a desire revived!!" Photo credit score: The proprietor of this following traveling trailer actually really did not get rid of the decals.
She states the outline of the decals was still noticeable up close but was unnoticeable from 5 feet away. She claims the whole task cost her around $200.
How a lot does it cost to have a Motor home covered with vinyl? Of course, the price will certainly vary from one place to one more.
Rv Painting Orange, CA
They likewise have a base cost of $4,500 to wrap a motor home, not consisting of upgrades and attachments. So as you can see, covering a RV costs rather a little bit greater than painting it! This motorhome proprietor removed the stickers himself prior to taking it to be skillfully covered. He thought there would certainly be an additional cost to have the graphics removed and wished to save some cash.
, however she still assists out as the blog site editor.
Her favorite thing about recreational vehicle life is the challenge of finding the excellent way to arrange a space, and she enjoys seeing all the imaginative and creative means people develop to customize their RVs.
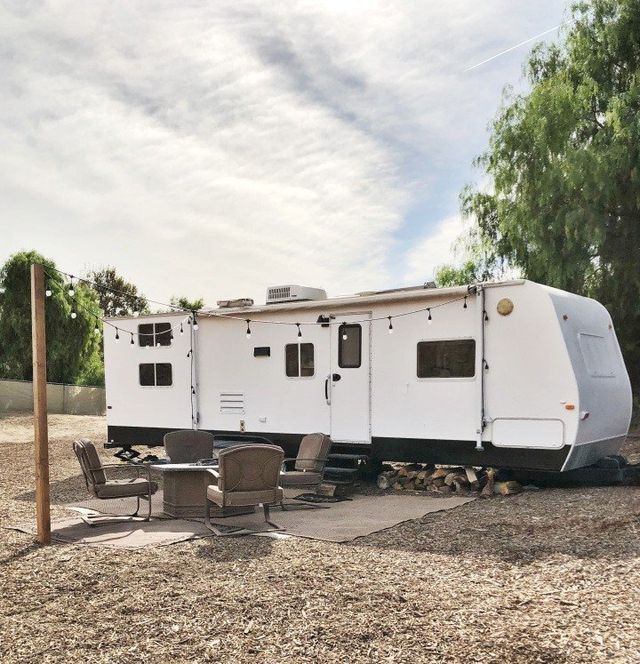
Check out these campers with repainted outsides for ideas! We began by removing the decals with a rubber attachment, which was probably the most significant task.
Painting Rv Walls Orange, CA
The proprietor states, "It's been 4 years with extreme Canadian winters, and the fiberglass looks amazing!" Image credit score: To repaint the green, gray, and white motorhome in the picture below, the proprietors made use of Behr Marquee outside home paint. They claimed they have actually had no concerns with it flaking or peeling until now.
They state the paint has stood up well in spite of the RV being saved outdoors in Minnesota year-round. They claimed the only thing they would do in a different way if they had the project to do over would certainly be to utilize a semi-gloss paint luster as opposed to the flat/matte coating they selected to make it simpler to cleanse.
Motorhome Painting Near Me Orange, CA
Below is a side-by-side of what this traveling trailer looked like previously and after its transformation. It truly reveals exactly how a lot a distinction painting your RV can make!
They feel the level black paint is tough to maintain clean and would certainly advise a shiny sheen. The customer they renovated this camper for urged on the level surface, and I have to admit, it does look terrific! Family.
She wrote in an Instagram post that she originally utilized this painting method on the refrigerator inside the camper. Then, she later on determined to repaint the outside to match! She claimed: "My driveway is formally destroyed, but the art trailer is remarkably amazing. And I'll destroy my driveway over and over to make a dream revived!!" Photo credit history: The owner of this next traveling trailer really didn't get rid of the decals.
Motorhome Custom Paint Orange, CA
She says the synopsis of the stickers was still visible up close however was undetectable from five feet away. She claims the whole project cost her around $200.
Just how much does it set you back to have a Recreational vehicle covered with plastic? Of training course, the rate will differ from one place to another.
Rv Paint Repair Orange, CA
They additionally have a base rate of $4,500 to wrap a Recreational vehicle, not consisting of upgrades and add-ons. As you can see, covering a Recreational vehicle costs quite a bit extra than painting it!
Picture credit rating: Strong shade wraps are additionally an option for Motor homes. SCS Covers in Montana did this environment-friendly motorhome solid cover. (You can comply with the pet dog who travels in this motor home here!.?.!!) Image credit score: Ashley Mann established in 2017. She handed off the internet site to brand-new owners in 2022 to introduce a brand-new company as an on the internet business owner trainer, but she still aids out as the blog site editor.
OCRV Center
Address: 23281 La Palma Ave Yorba Linda, CA 92887Phone: (714) 909-1444
Email: [email protected]
OCRV Center
Her favorite point about recreational vehicle life is the difficulty of locating the perfect method to arrange a room, and she likes seeing all the creative and brilliant ways people create to tailor their Motor homes.
Painting Fiberglass Motorhome Orange, CARv Paint Job Orange, CA
Rv Exterior Paint Orange, CA
Painting Rv Orange, CA
Motorhome Paint Shops Orange, CA
Rv Paint Shops Near Me Orange, CA
Rv Exterior Paint Orange, CA
Paint Fiberglass Rv Orange, CA
Rv Painter Orange, CA
Rv Exterior Paint Orange, CA
Rv Paint Orange, CA
Motorhome Painting Orange, CA
Rv Exterior Paint Orange, CA
Rv Painter Orange, CA
Motorhome Paint Repair Orange, CA
Painting An Rv Orange, CA
Rv Paint Shop Near Me Orange, CA
Motorhome Painting Near Me Orange, CA
Painting Rv Walls Orange, CA
Custom Rv Paint Orange, CA
Custom Painted Motorhomes Orange, CA
Motorhome Custom Paint Orange, CA
Rv Paint And Body Shops Near Me Orange, CA
Rv Paint Shops Near Me Orange, CA
Motorhome Painting Orange, CA
Rv Paint Job Orange, CA
Rv Paint Shop Near Me Orange, CA
Motorhome Painting Orange, CA
Painting Fiberglass Motorhome Orange, CA
Rv Paint Repair Orange, CA
Rv Paint And Body Shops Near Me Orange, CA
Painting Rv Walls Orange, CA
Rv Paint Orange, CA
Painting Rv Walls Orange, CA
Rv Exterior Paint Orange, CA
Rv Exterior Paint Orange, CA
Motorhome Painting Near Me Orange, CA
Painting Rv Exterior Orange, CA
Class A Rv Custom Paint And Repair Orange, CA
Painting Rv Walls Orange, CA
Motorhome Custom Paint Jobs Orange, CA
Custom Painted Motorhomes Orange, CA
Custom Rv Paint Jobs Orange, CA
Painting An Rv Orange, CA
Motorhome Paint Repair Orange, CA
Motorhome Custom Paint Jobs Orange, CA
Rv Paint Orange, CA
Rv Paint Orange, CA
Motorhome Paint Repair Orange, CA
Paint Rv Orange, CA
Motorhome Painting Near Me Orange, CA
Rv Painter Orange, CA
Painting An Rv Orange, CA
Paint Motorhome Exterior Orange, CA
Motorhome Custom Paint Jobs Orange, CA
Rv Paint Shops Near Me Orange, CA
Rv Paint Job Orange, CA
Rv Paint Orange, CA
Rv Paint And Repair Orange, CA
Motorhome Custom Paint Jobs Orange, CA
Rv Painting Near Me Orange, CA
Motorhome Painting Near Me Orange, CA
Painting Rv Exterior Orange, CA
Rv Paint Repair Orange, CA
Custom Rv Paint Orange, CA
Paint Motorhome Exterior Orange, CA
Painting Fiberglass Motorhome Orange, CA
Motorhome Paint Shops Orange, CA
Painting Rv Exterior Orange, CA
Paint Motorhome Exterior Orange, CA
Painting Rv Walls Orange, CA
Rv Paint And Repair Orange, CA
Motorhome Custom Paint Orange, CA
Motorhome Painting Orange, CA
Painting Fiberglass Motorhome Orange, CA
Paint Fiberglass Rv Orange, CA
Motorhome Custom Paint Jobs Orange, CA
Class A Rv Custom Paint And Repair Orange, CA
Around Me Seo Orange, CA
Find A Good Seo Services For Business Orange, CA
OCRV Center
Table of Contents
- – Paint Fiberglass Rv Orange, CA
- – OCRV Center
- – Rv Painting Orange, CA
- – Painting Fiberglass Motorhome Orange, CA
- – Rv Paint And Body Shops Near Me Orange, CA
- – Rv Paint Repair Orange, CA
- – Rv Paint Shops Near Me Orange, CA
- – Rv Painting Near Me Orange, CA
- – Rv Paint And Repair Orange, CA
- – Rv Paint Shop Near Me Orange, CA
- – Rv Paint Job Orange, CA
- – Rv Painting Orange, CA
- – Painting Rv Walls Orange, CA
- – Motorhome Painting Near Me Orange, CA
- – Motorhome Custom Paint Orange, CA
- – Rv Paint Repair Orange, CA
- – OCRV Center
Latest Posts
Commercial Hood Cleaning Service Universal City
Beverly Hills Heating Maintenance Services
Hvac Repair Contractor Burbank
More
Latest Posts
Commercial Hood Cleaning Service Universal City
Beverly Hills Heating Maintenance Services
Hvac Repair Contractor Burbank