All Categories
Featured
Table of Contents
- – Rubber Roofing For Campers Villa Park, CA
- – OCRV Center
- – Rubber Roof Installation Villa Park, CA
- – Epdm Rv Roof Repair Villa Park, CA
- – Epdm Rv Roof Repair Villa Park, CA
- – Rv Roof Leak Repair Near Me Villa Park, CA
- – Epdm Rv Roof Repair Villa Park, CA
- – Rv Trailer Rubber Roof Repair Villa Park, CA
- – Epdm Rv Roof Repair Villa Park, CA
- – Rv Roof Replacement Villa Park, CA
- – Rv Roof Leak Repair Near Me Villa Park, CA
- – Replace Rv Roof Villa Park, CA
- – Resealing Rv Roof Villa Park, CA
- – Rv Roof Leak Repair Near Me Villa Park, CA
- – OCRV Center
Rubber Roofing For Campers Villa Park, CA
Long story short, Progressive paid our whole initial Price quote - IN FULL. The customer was really upset because they had Springtime Damage camping plans, and we didn't understand if we 'd be able to get the fixings done in time due to all the hold-ups.
He called Progressive and must have been not-so-nice because he got the adjustor's supervisor included. When the manager male chatted to the consumer, he was playing it up large. He said in order to get the repairs done as soon as possible so they could make their trip, we can order parts overnighted and they 'd cover it.
It was hard throughout. Without entering into all of it, we did the roof our means - the right means - and they really did not call for the adjustor ahead and check it after tear-down. They enabled us to send images which, obviously, showed the damage left after tearing up the initial EPDM.
Rubber Roof Installation Villa Park, CA
Offered all the problem Progressive had actually offered us over this repair service, we meant to hang onto the recreational vehicle until we were guaranteed payment of the final $1,542.75 they had actually kept for the roof repair services. When we called them they sent out a screenshot of the request for payment to be issued, saying they "wished it would be enough." Since we truly liked this client and he did have plans, we let the motor home leave the shop on 3/30/18.
and didn't come ... and really did not come. When we contacted them once again, they stated they would certainly quit repayment and release a brand-new one. We FINALLY got settlement 4/23/18. Got a one-line e-mail from the client yesterday: "Exactly how frustrating has this procedure been." He's going shopping for new insurance policy. Photos of roof covering with brand-new substrate, and after that finished.
Epdm Rv Roof Repair Villa Park, CA
Motor home roofing fixing is essential. Disregarding it can compromise the stability of your motor home traveling trailer or motorhome. And considering that dealing with a tear in your rubber roofing is so very easy, there's no factor to delay. Maybe you have actually discovered from experience that recreational vehicle rubber roof coverings and tree branches don't mix.
It can make it through temperatures from -50 F to +240 F without cracking. It can be strolled on, is adaptable, and has good resistance to abrasion. As a result of its slow-moving aging rate in the sunlight, makers commonly offer a 10-12 year guarantee on their EPDM rubber roofs. Many rubber roofings will see a lifespan of 20+ years.
Epdm Rv Roof Repair Villa Park, CA
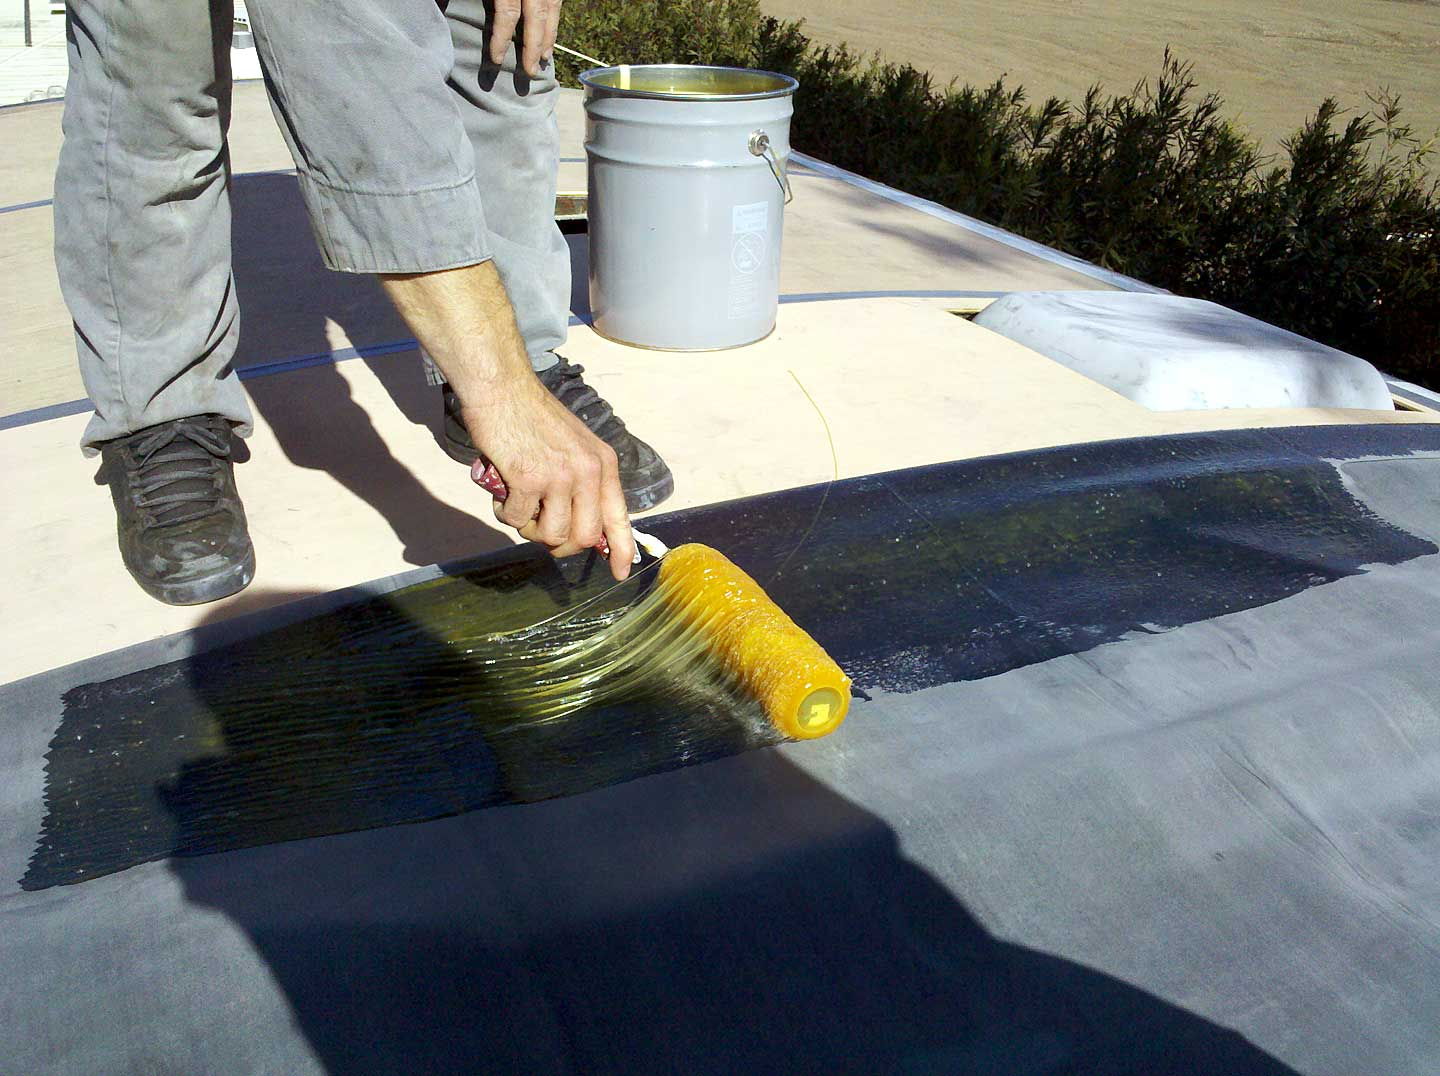
Products like Flex Seal Liquid Rubber Sealer Coating been available in a container and are splashed onto the broken area. The sealant seeps right into splits and holes and remains versatile once dry. This fast and easy repair work approach works well for small damages. Now I'll describe how to apply a spot to the damaged location, after that I'll review spot kits and recreational vehicle roof covering repair service tape in much more information.
Take a piece of EPDM rubber membrane layer and utilize a razor blade (or sharp scissors) to cut a patch 2 inches larger than the damaged area. Round the corners and leave no jagged edges. The patch over the damaged location and utilize a pen or pencil to draw a line around the patch, marking its area on your roof covering.
A scrub pad might be used on persistent dust, discolorations, sap, etc. Tidy the base of the patch also.
Rv Roof Leak Repair Near Me Villa Park, CA
Lay down a bead of lap sealer over the side of the patch. As soon as completely dry, your work is done and your motor home's roof should await rain. Spot packages make RV roofing repair service even less complicated. Products like the Dicor Patchit Package consist of an item of peel and stick EPDM rubber.
Simply stick the spot on and secure the side with the lap sealant. Motor home roofing repair service spot kit Tape is the most basic recreational vehicle roofing repair work of all. EternaBond has been making a difficult self-sealing tape for a number of years currently. It's used simply like any tape. Cut a piece and lay it on your motor home roofing over the damaged location.
produces a durable watertight seal on a range of surface areas, consisting of EPDM rubber, TPO, Hypalon, steel, many PVC, tile, wood, and concrete (Rv Rubber Roof Maintenance Villa Park). It has exceptional UV defense and is claimed to last greater than 20 years. Recreational vehicle roofing system repair tape by Dicor Dicor, the leading manufacturer of recreational vehicle rubber roofings, has a self-sealing tape called Seal-Tite Tape
Epdm Rv Roof Repair Villa Park, CA
It stops leaks quickly and has a long life period too. As you would when applying a spot, you'll require to get rid of all dust and crud from your roofing before applying the tape. Motor home roof repair tape will not follow silicone, so any type of silicone caulking needs to be eliminated initially.
Much better to be secure than sorry and obtain it repaired currently. Self-Leveling Lap Sealant First, remove old caulking with a scraper tool, after that clean the location to remove all dirt and grime. Utilize a cleaner that's compatible with EPDM rubber, such as Protect All Rubber Roofing Cleanser. Currently reseal the seam utilizing a RV self-leveling lap sealer, such as Dicor Self-Leveling Lap Sealant, which continues to be flexible when dried out.
Rv Trailer Rubber Roof Repair Villa Park, CA
When dry, it has a smooth surface with a rubbery feel. An option to lap sealant is to make use of a recreational vehicle roof repair work tape, such as EternaBond RoofSeal or Dicor Seal-Tite on your motor home roof covering joints. These tapes are much longer enduring than lap sealer, and when you have actually secured your seams with it, you more than likely will never ever have to do it once more.
My RV roof covering that requires to be changed! If you're like me and have even more time than cash, after that maybe your ideal alternative is to acquire an old Motor home and repair it up.
I obtain it. I bought my recreational vehicle over a year ago and really did not have the digestive tracts to begin tackling this task up until today. I'm below to inform you, if I can do it, you can do it. Can I actually do it? Stay tuned and figure out! I bought this 1993 Jamboree for $5000.
Epdm Rv Roof Repair Villa Park, CA
The catch? Water damages! I've never ever dealt with a recreational vehicle prior to and I need to admit, I'm scared. I've done a great deal of residence renovation and I'm still scared. That's since this is all brand-new to me and I have no concept what to expect. With any luck if you're taking into consideration doing this yourself, complying with along on my motor home roofing replacement task will give you the nerve to dive in! The tools I used today.
That seemed to be my cheapest choice.
I figured I prefer to have it semi-portable so I opted for the canopy, plus this enables me to readjust the elevation up and down when I need to. Certainly the least expensive alternative of all would certainly be to simply throw a good tarpaulin over the top of your recreational vehicle for stormy days and only job on bright days! Initially I elevated the legs with 1 1/2 PVC pipe that fit inside the legs and afterwards I connected a hose clamp around the PVC pipe to stand up the canopy legs.
Rv Roof Replacement Villa Park, CA
This is still a little saggy. I most likely should have forked out for some stiff steel pipe from the start.
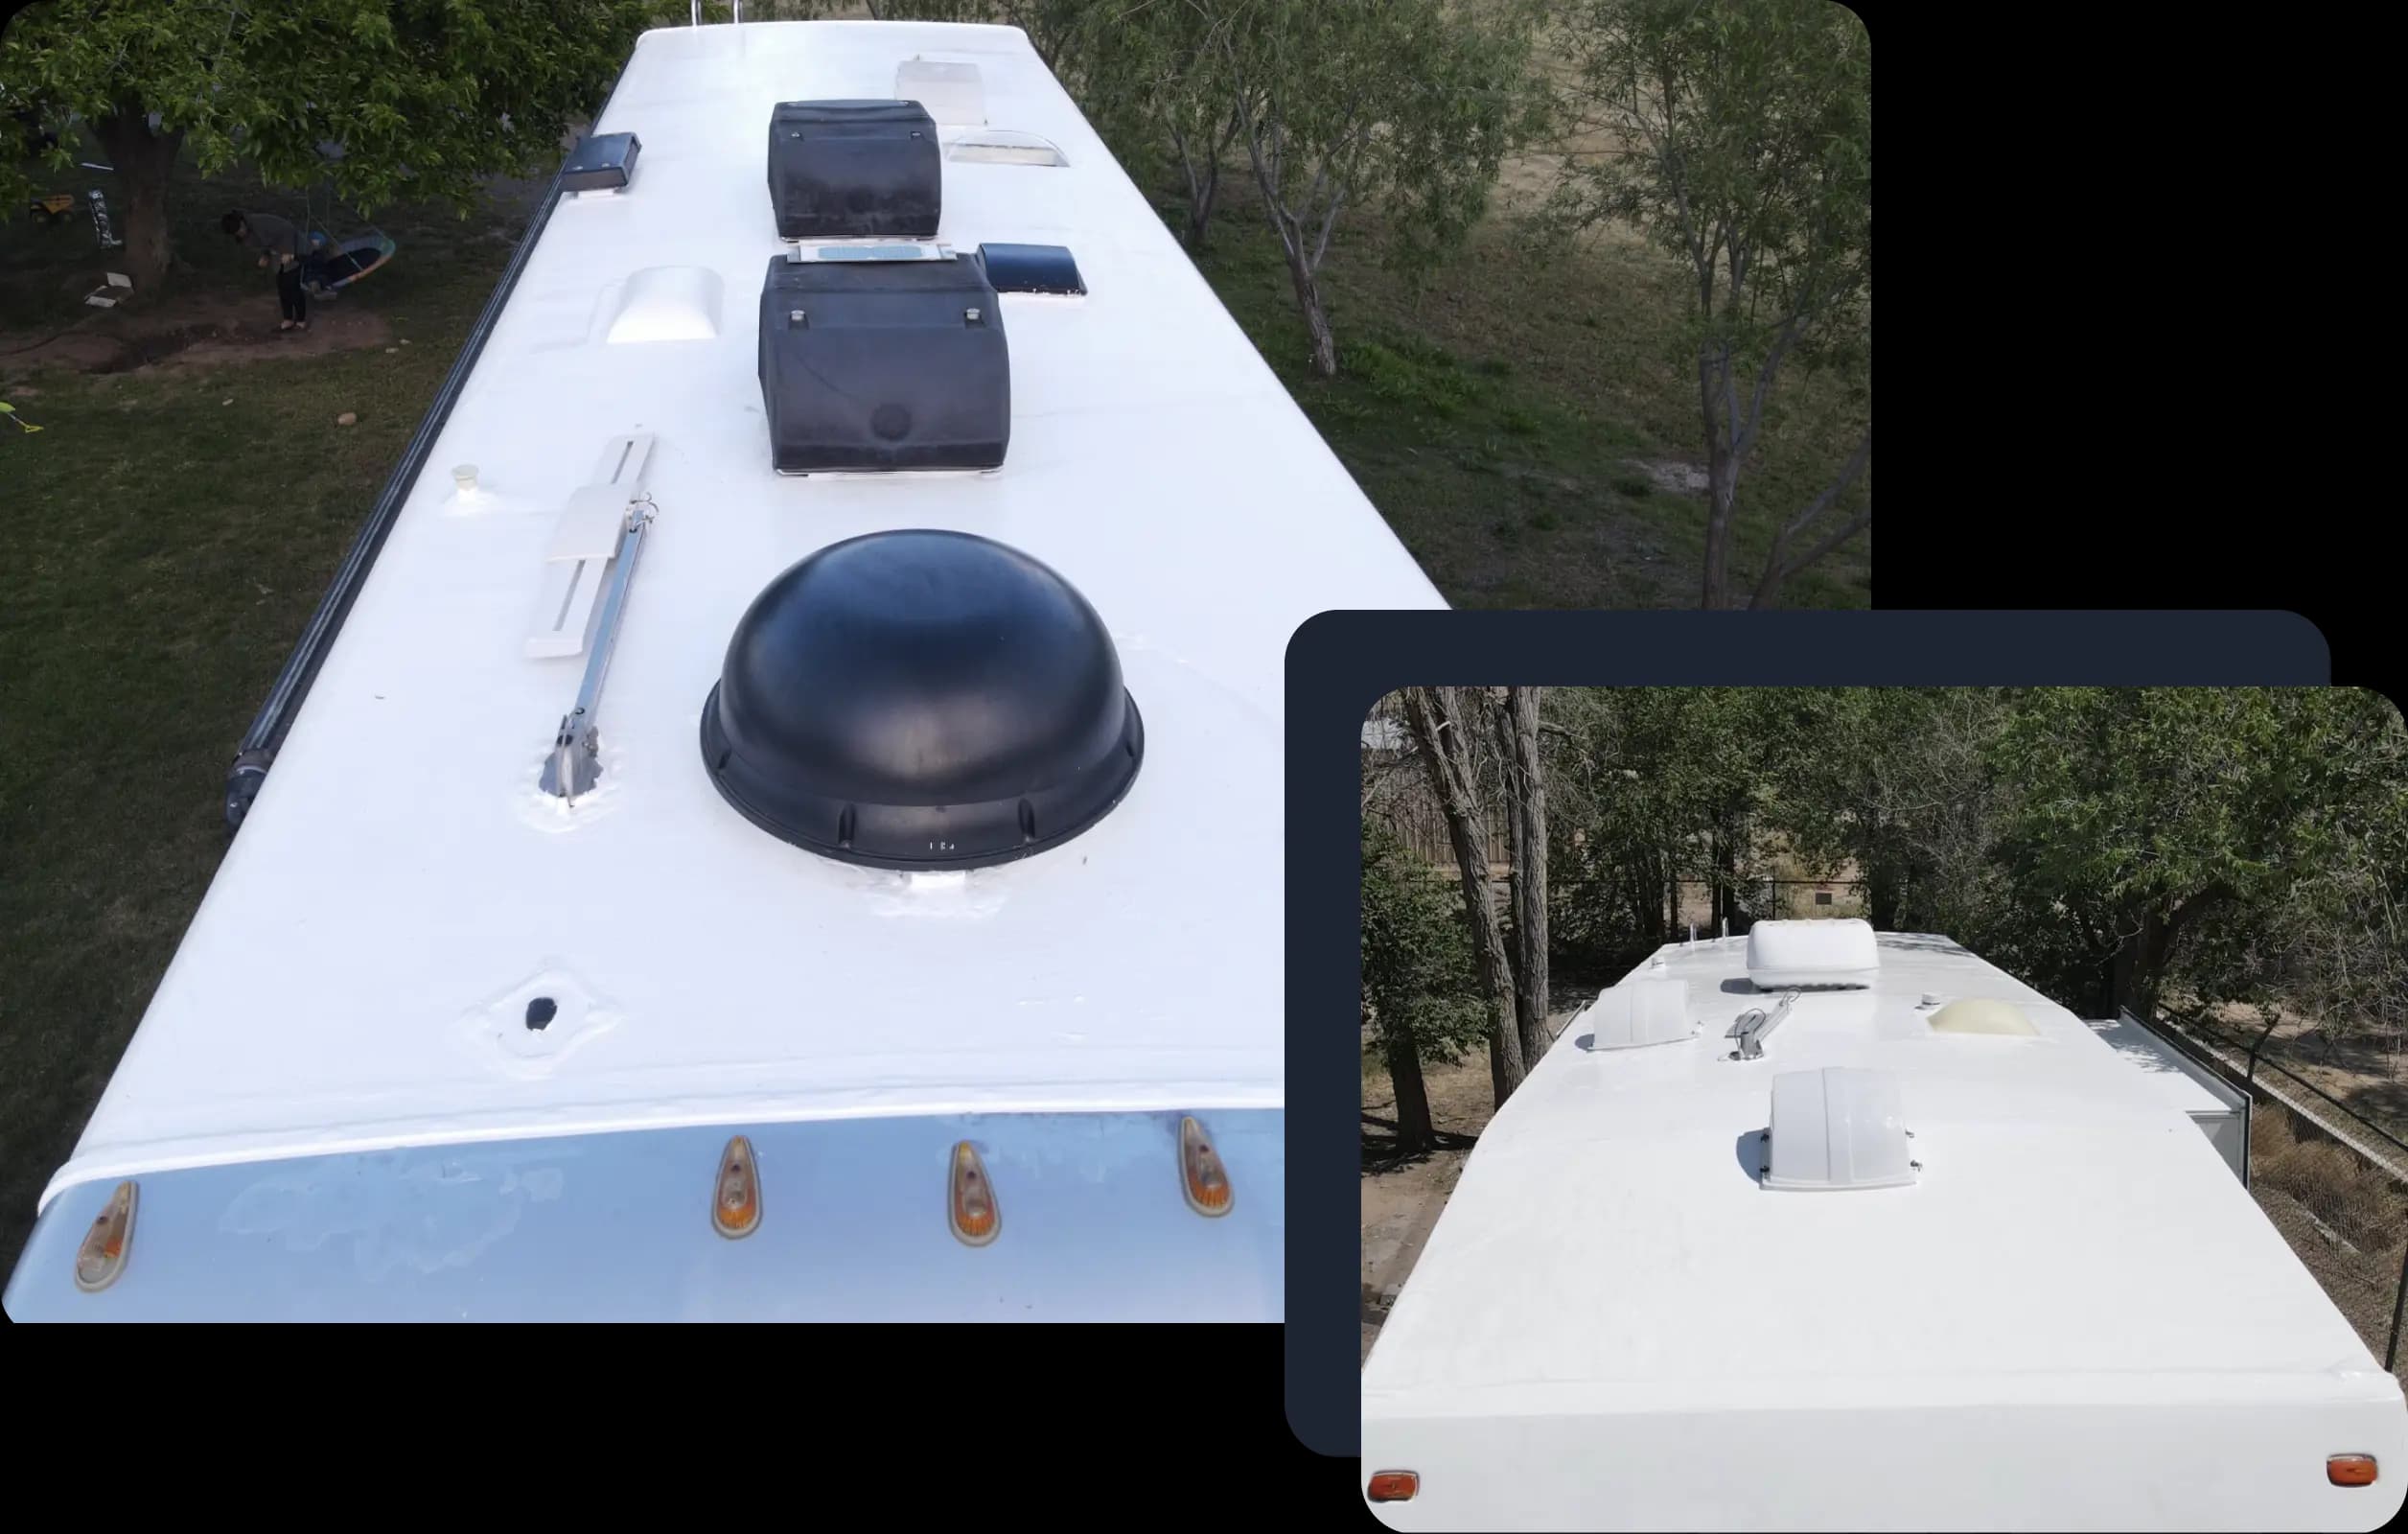
An old patch work on the Recreational vehicle rubber roofing system. As you can see, this roofing has actually had a whole lot of concerns over the years.
I ordered an energy blade and started cutting. The initial point I observed is that there were 2 layers. On the base is the initial EPDM rubber roof covering layer. I know it's EPDM rubber and not TPO rubber as a result of the black support. (TPO roofing is white on both sides.) In addition to my EPDM roof is a thin motor home roofing coating that was applied later.
I simply left the roof coating stuck to the EPDM roofing and pulled them up with each other. Starting to peel off roofing layer.
Rv Roof Leak Repair Near Me Villa Park, CA
I cut lines with an energy knife around components. All rubber roofing gotten rid of from camper. This step went pretty rapidly. There was an adhesive under the bottom layer of rubber that was still rather well stuck in several areas, yet with a great little pressure it peeled up cleanly.
Currently I might see all the harmed plywood roofing system decking beneath. I chose to peel off the rubber before removing fixtures just so I could see what I was dealing with.
Replace Rv Roof Villa Park, CA
If you believe you'll be saving the roof decking plywood (not replacing it), then you may conserve yourself some cleanup trouble by eliminating the fixtures first and after that peeling off up the rubber! Detail of water damage on camper roofing. A lot more water damaged locations on RV roofing outdoor decking. There was nothing really terrible that made me seem like I was mosting likely to drop via, but definitely a great deal of damage and I was getting the feeling I would certainly be replacing a whole lot of the roofing system decking plywood.
I went for the most basic one initially, an air vent cap from a cooking area sink plumbing air vent pipe. There is no various other way around this, you simply have to begin digging up until you reveal the screw heads.
Unscrewing the screws in vent cap. The screws on this air vent cap were hex-head metal screws so I used a tiny socket vehicle driver to eliminate them.
I found an old wasp nest inside the air vent cover. This is a view I'll most likely need to get utilized to, finding the remains of pet habitation high and low. I invest a terrible whole lot of my time producing great wildlife environment in my lawn so I don't get annoyed when an animal selects to establish up home in my motor home.
Resealing Rv Roof Villa Park, CA
Luckily no one was home in this old nest so I simply threw it. Possibly I'll put a display over it when replacing it. Which brings us to the next point. You must try not to harm these items (like air vent covers and caps) as you're scuffing off the old caulk and sealant just in case you need to use them once again.
Next I determined to tackle the only roof air flow fan that my camper has. My roofing system vent likewise had a vent cover over it. Beginning on the roof vent.

The fasteners on this Recreational vehicle roofing air vent cover were nuts on tiny screws. The 2nd one simply started spinning, suggesting the screw was not dealt with in location yet transforming along with the nut. A peek at the hardware holding down the roofing vent cover.
I didn't have any excellent way to hold the bolt in position so instead I chose to saw via the screws with a reciprocating saw. Sawing through screws on roofing system air vent cover. I utilized a cordless reciprocating saw with a metal-cutting blade yet it was tricky to obtain the blade level enough to get to the bolts so close to the roof covering deck.
Rv Roof Leak Repair Near Me Villa Park, CA
Bending the blade a bit to reach near the roofing system deck. When I had sawn through the remaining 3 screws, I tore up the cover. The brackets that were holding the cover in position. Cover eliminated from roof vent. I loosened the brackets from the flange of the air vent fan itself.
I scuffed extra caulk and roofing system sealer off the flange of the roofing vent itself. I quickly uncovered there were no a lot more screws or equipment holding it down so I offered up on the scraping and went inside the Recreational vehicle After scratching the caulk and sealant from flange of roof covering air vent, no more screws!
I picked a drill bit close to the dimension of the shaft of the screws that I had already pulled out and started exploration. Selecting a drill bit for piercing out a screw head.
OCRV Center
Address: 23281 La Palma Ave Yorba Linda, CA 92887Phone: (714) 909-1444
Email: [email protected]
OCRV Center
I pierced out the heads, one popped off and the various other I was getting irritated with and offered it a yank before it was drilled through. Instead of popping off the screw head, the plastic simply melted away around the hot screw head.
Rv Roof Leak Repair Villa Park, CARv Roof Maintenance Villa Park, CA
Rv Roof Repair Fiberglass Villa Park, CA
Roof Repair For Rv Villa Park, CA
Class C Rv Roof Repair Villa Park, CA
Rv Roof Repair Fiberglass Villa Park, CA
Rv Rubber Roof Replacement Cost Villa Park, CA
Rv Fiberglass Roof Repair Villa Park, CA
Rv Fiberglass Roof Repair Villa Park, CA
Rv Roof Repair Villa Park, CA
Roof Repair For Rv Villa Park, CA
Rubber Roof For Camper Villa Park, CA
Rv Trailer Rubber Roof Repair Villa Park, CA
Rv Roof Leak Repair Villa Park, CA
Rv Roof Repair Fiberglass Villa Park, CA
Rv Roof Leak Repair Villa Park, CA
Rv Roof Maintenance Villa Park, CA
Rv Roof Repair Service Near Me Villa Park, CA
Rv Roof Leak Repair Near Me Villa Park, CA
Rv Roof Repair Fiberglass Villa Park, CA
Rubber Roof Installation Villa Park, CA
Rubber Roof Installation Villa Park, CA
Rv Roof Repair Fiberglass Villa Park, CA
Rv Roof Repair Near Me Villa Park, CA
Rv Roof Repair Villa Park, CA
Rv Rubber Roof Replacement Villa Park, CA
Rv Roof Replacement Villa Park, CA
Rv Rubber Roof Maintenance Villa Park, CA
Motorhome Roof Replacement Villa Park, CA
Rv Rubber Roof Repair Villa Park, CA
Resealing Rv Roof Villa Park, CA
Repair Rv Roof Leak Villa Park, CA
Rv Roof Leak Repair Near Me Villa Park, CA
Rv Rubber Roof Maintenance Villa Park, CA
Roof Repair For Rv Villa Park, CA
Roof Repair For Rv Villa Park, CA
Rubber Roofing For Rv Villa Park, CA
Epdm Rv Roof Repair Villa Park, CA
Rv Roof Repair Service Near Me Villa Park, CA
Rubber Roof For Rv Villa Park, CA
Rv Trailer Roof Repair Villa Park, CA
Rv Rubber Roof Replacement Villa Park, CA
Rubber Roofing For Campers Villa Park, CA
Rv Slide Out Roof Repair Villa Park, CA
Rv Fiberglass Roof Repair Villa Park, CA
Rubber Roofing For Campers Villa Park, CA
Rv Roof Repair Service Near Me Villa Park, CA
Rubber Roofing For Campers Villa Park, CA
Rv Rubber Roof Replacement Villa Park, CA
Rv Rubber Roof Replacement Villa Park, CA
Rv Rubber Roof Maintenance Villa Park, CA
Rubber Roof For Rv Villa Park, CA
Rv Rubber Roof Maintenance Villa Park, CA
Rv Rubber Roof Maintenance Villa Park, CA
Resealing Rv Roof Villa Park, CA
Epdm Rv Roof Repair Villa Park, CA
Rubber Roof Installation Villa Park, CA
Repair Rv Roof Leak Villa Park, CA
Rv Trailer Roof Repair Villa Park, CA
Epdm Rv Roof Repair Villa Park, CA
Rv Roof Maintenance Villa Park, CA
Rv Roof Repair Villa Park, CA
Rv Roof Leak Repair Villa Park, CA
Rv Rubber Roof Replacement Villa Park, CA
Rubber Roof For Rv Villa Park, CA
Resealing Rv Roof Villa Park, CA
Replace Rv Roof Villa Park, CA
Rv Rubber Roof Repair Villa Park, CA
Best Rv Roof Repair Villa Park, CA
Motorhome Roof Replacement Villa Park, CA
Rv Roof Repair Near Me Villa Park, CA
Rubber Roof For Camper Villa Park, CA
Repair Rv Roof Leak Villa Park, CA
Rv Roof Repair Near Me Villa Park, CA
Rv Rubber Roof Maintenance Villa Park, CA
Rv Roof Replacement Villa Park, CA
Rv Rubber Roof Maintenance Villa Park, CA
Rv Rubber Roof Replacement Cost Villa Park, CA
Around Here Seo Optimization Services Villa Park, CA
Around Me Seo Company Near Me Villa Park, CA
Rv Rubber Roof Maintenance Villa Park, CA
OCRV Center
Table of Contents
- – Rubber Roofing For Campers Villa Park, CA
- – OCRV Center
- – Rubber Roof Installation Villa Park, CA
- – Epdm Rv Roof Repair Villa Park, CA
- – Epdm Rv Roof Repair Villa Park, CA
- – Rv Roof Leak Repair Near Me Villa Park, CA
- – Epdm Rv Roof Repair Villa Park, CA
- – Rv Trailer Rubber Roof Repair Villa Park, CA
- – Epdm Rv Roof Repair Villa Park, CA
- – Rv Roof Replacement Villa Park, CA
- – Rv Roof Leak Repair Near Me Villa Park, CA
- – Replace Rv Roof Villa Park, CA
- – Resealing Rv Roof Villa Park, CA
- – Rv Roof Leak Repair Near Me Villa Park, CA
- – OCRV Center
Latest Posts
Senior Pictures Photographers Fullerton
Best Family Photography Fountain Valley
Personal Care Attendant Mecca
More
Latest Posts
Senior Pictures Photographers Fullerton
Best Family Photography Fountain Valley
Personal Care Attendant Mecca